How to Use a Clothes Steamer: A Step-by-Step Guide
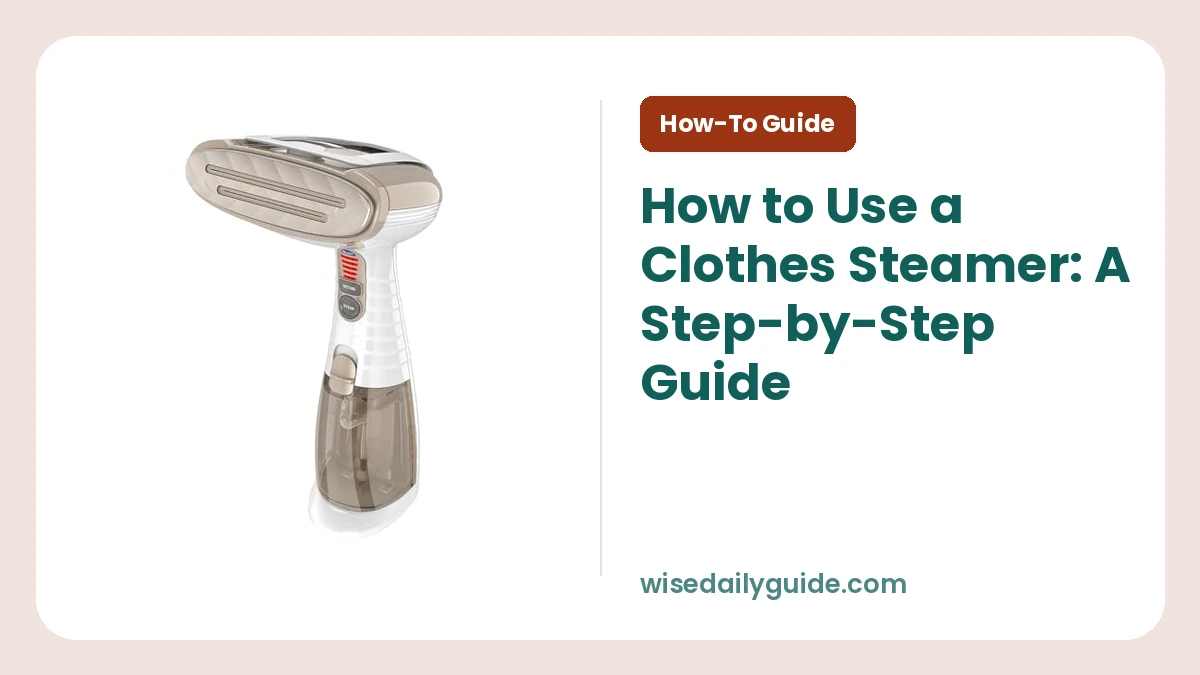
A clothes steamer removes wrinkles by sending hot steam through fabric while the garment hangs. To learn how to use a clothes steamer, fill the tank with the water your manual recommends, let the unit heat for about one to three minutes, then move the steam head slowly from top to bottom. Most shirts take two to five minutes. Keep the steam head moving, hold the fabric taut, and let the garment dry before wearing it.
Steamers work well on shirts, dresses, curtains, and many delicate fabrics. They are not the right tool for sharp trouser creases or heavily wrinkled thick linen, where an iron gives more pressure.
What You Need Before You Start
Gather a few simple items before plugging in the steamer:
- A clothes steamer with its tank, steam head, and any brush attachment
- Clean water, following the water guidance in the manual
- A sturdy hanger or garment rack
- A heat-safe place to set the steamer upright
- A clean towel for catching drips or protecting a nearby surface
- A garment care label to check the fabric instructions
Use a rack that will not tip. A shower rod can work for a light blouse, but it is not a good choice for a heavy coat. Never steam clothing while you are wearing it. Steam can burn skin quickly, even through thin fabric.
How to Use a Clothes Steamer Step by Step
These clothes steamer instructions apply to most handheld and upright models. Your manual has the final word on fill lines, water type, attachments, and warm-up time.
1. Check the fabric care label
Read the garment label before steaming. Silk, wool, polyester, cotton, rayon, and blends can usually be steamed carefully. Leather, suede, waxed jackets, and items labeled “do not steam” need another wrinkle-removal method.
For an unfamiliar or delicate fabric, test a hidden inside seam first. Hold the steam head slightly away from the fabric and check for water marks, color change, or texture change after it dries.
2. Fill the water tank to the marked line
Unplug the steamer and remove the tank, if your model has one. Fill it only to the maximum line. An overfilled tank can spit water instead of producing a steady flow of steam.
Many steamers can use tap water, while others call for distilled or demineralized water because hard water leaves mineral scale inside the unit. Follow the manual rather than guessing. Do not add perfume, starch, essential oils, vinegar, or fabric softener to the tank unless the manufacturer clearly permits it.
3. Hang the garment and smooth it with your hand
Place the garment on a hanger. Button a shirt and zip a dress so the fabric hangs in its natural shape. Pull the hem gently with one hand to create a flat surface.
Keep your fingers behind the fabric and away from the steam path. For sleeves, place your hand inside only after you turn the steam off and the area has cooled, or use a heat-resistant mitt if one came with the steamer.
4. Plug in the steamer and let it heat fully
Set the steamer upright on a firm, level surface. Plug it directly into a properly grounded wall outlet when possible. Avoid using an extension cord unless the manual says it is safe.
Wait until the ready light appears or steam begins flowing evenly. Starting too early is a common reason for sputtering and wet spots. Handheld units may take around one minute, while larger upright models can take several minutes.
5. Select the correct steam level
Start with a low setting for delicate fabrics and move up only when needed. Steam settings control the amount of steam released, not the temperature of an iron plate.
For most garments, begin at a middle setting. A light blouse needs less moisture than a thick cotton shirt. This simple approach prevents over-wetting the fabric and saves water.
6. Steam from the top down in slow passes
Hold the steam head against the fabric or about a half-inch away, based on your model’s instructions. Move it downward at a slow, steady pace. Do not leave it in one spot.
Start with the collar and shoulders, then steam the front panels, sleeves, and back. Give each wrinkled area one or two passes before adding more. Steam relaxes fibers, but it needs a moment to work.
7. Use the right technique for details and heavier fabric
For collars, cuffs, pleats, and pockets, use short passes and pull the fabric flat. Some steamers include a fabric brush. This attachment can lift the fibers of thick fabrics, such as wool blends, so steam reaches deeper.
With thick cotton, denim, or linen, steam both sides. Let the first side cool for a minute, then turn the item over. A steamer softens wrinkles but does not press a crisp crease like an iron.
8. Let the garment dry before wearing or storing it
Leave the garment on the hanger for five to ten minutes. Fabric can feel dry on the surface while holding moisture inside the fibers. Wearing or folding it immediately can put wrinkles back in place.
Unplug the steamer once you finish. After it cools, empty the tank unless the manual directs otherwise. Storing water in the tank encourages mineral buildup and can cause leaks.
Clothes Steamer Settings Explained
The labels vary by model, but the basic choices are similar. A setting should match fabric weight and wrinkle depth, not just the garment type.
| Setting or feature | Best use | How to use it safely |
|---|---|---|
| Low or delicate | Silk, sheer synthetics, light rayon | Hold the head slightly away and test a hidden area first. |
| Medium | Most shirts, dresses, polyester, and blends | Use slow downward passes with light tension on the fabric. |
| High or max | Cotton, linen, denim, and heavier drapes | Use on sturdy fabrics only and steam both sides for deep wrinkles. |
| Continuous steam lock | Large loads, curtains, or several garments | Release the lock before setting the steamer down. |
| Fabric brush | Thick or textured fabrics | Attach it only when the unit is cool, unless your manual says otherwise. |
Some clothes steamers have one steam level. In that case, you control the intensity by changing your distance, speed, and number of passes. More space between the head and the fabric gives delicate items a gentler treatment.
Clothes Steamer Beginner Tips for Better Results
A few small habits make steaming faster and reduce the chance of drips.
- Steam clean garments. Heat can set odors or residue into fabric.
- Begin with the least visible item while you get used to the steam flow.
- Keep the steamer upright. Tilting many handheld units too far can make hot water leak or sputter.
- Use distilled water where the manual recommends it, especially in hard-water areas.
- Do not force wrinkles out with repeated passes. Let the fabric cool, then reassess.
- Steam curtains from top to bottom, with a towel beneath the hem to catch moisture.
- Wait for the unit to heat after each refill. Cold water in a hot unit can cause temporary sputtering.
For a button-down shirt, steam the back first. That lets you practice your pace before working on the collar and front, which are the parts people notice most.
How Often Should You Steam Clothes?
Steam clothing when it looks wrinkled, smells stale, or needs a quick refresh between washes. You do not need to steam every item after every wear. Excess moisture is hard on some structured garments and can loosen glued trims over time.
Steaming works especially well for clothes that have been packed in a suitcase, hung in a crowded closet, or worn briefly. For bedding, keep the steam head moving and avoid soaking the fabric. A steamer does not replace washing when an item is dirty.
Auto Shut-Off and Energy Use
Auto shut-off is a useful safety feature, but it does not make a plugged-in steamer safe to leave unattended. Depending on the model, it turns off the heater after a period of inactivity or when water runs out. Some units need to be unplugged and reset before they heat again.
Check that your steamer is standing upright before relying on auto shut-off. Treat it as backup protection, not a reason to walk away while it is hot.
A clothes steamer's energy use depends on its wattage and how long it runs. Handheld units commonly use less power overall because their tanks are smaller and sessions are shorter. Larger upright steamers can use more power while heating, but they handle several garments without refilling. Fill only the water you need, heat the unit once, and steam similar items in one session to avoid wasting energy.
Common Mistakes That Leave Clothes Wet or Wrinkled
Moving too fast: Steam needs contact time. Slow your pass so the fabric warms and relaxes.
Holding the head still: This can over-wet the area and may affect delicate fabric. Keep the head in motion.
Using too much steam on a thin item: Switch to low, create more distance, and use fewer passes.
Ignoring sputtering: Stop steaming and let the unit heat fully. Check the water level and keep the unit upright. Persistent sputtering may point to mineral buildup, so follow the manual’s cleaning directions.
Forgetting the care label: Decorative trims, glued embellishments, and water-sensitive fabrics need special care. A professional cleaner is the safer choice for valuable or structured items.
A Simple Routine for Smooth Clothes
Set up a hanger, fill the tank correctly, and steam one garment at a time from top to bottom. Start gently, especially with delicate fabric, and give each item time to dry on the hanger. Once you learn the pace, using a clothes steamer becomes one of the quickest ways to make everyday clothes look ready to wear.
Frequently Asked Questions
How do you use a clothes steamer for the first time?
For your first use, read the manual, fill the tank to its marked line, and test the steamer on an old cotton shirt. Let it heat fully, then use slow downward strokes. This helps you learn how much steam it produces before you treat delicate or favorite clothing.
Can you use tap water in a clothes steamer?
You can use tap water only when the manufacturer permits it. In hard-water areas, minerals can collect inside the heater and reduce steam output. Many manuals recommend distilled or demineralized water instead. Never add scent boosters, vinegar, or other liquids unless the manual specifically approves them.
Should the steamer touch the fabric?
The steam head can touch many sturdy fabrics, but your manual should guide you. Cotton, polyester, and blends usually tolerate light contact. For silk, sheer fabric, velvet, or embellished items, hold the head slightly away. A small distance reduces the risk of water spots and crushed texture.
Why is my clothes steamer spitting water?
A steamer usually spits water because it has not heated fully, has been tilted too far, or contains too much water. Keep it upright and wait for a steady steam flow. Mineral buildup can also disrupt the flow, so use the water type and cleaning method listed in the manual.
Can a clothes steamer replace an iron?
A clothes steamer can replace an iron for many everyday wrinkles, especially on hanging garments and delicate fabrics. It cannot create sharp creases in trousers or crisp shirt cuffs as well as an iron. Keep an iron for tailored clothes, pleated items, and formal garments that need precise pressing.
Is auto shut-off enough to keep a clothes steamer safe?
No, auto shut-off is a backup feature, not a substitute for safe habits. Stay nearby while the unit is heating or producing steam, stand it upright, and unplug it after use. Keep the hot steam head away from children, pets, loose cords, and surfaces that water could damage.